
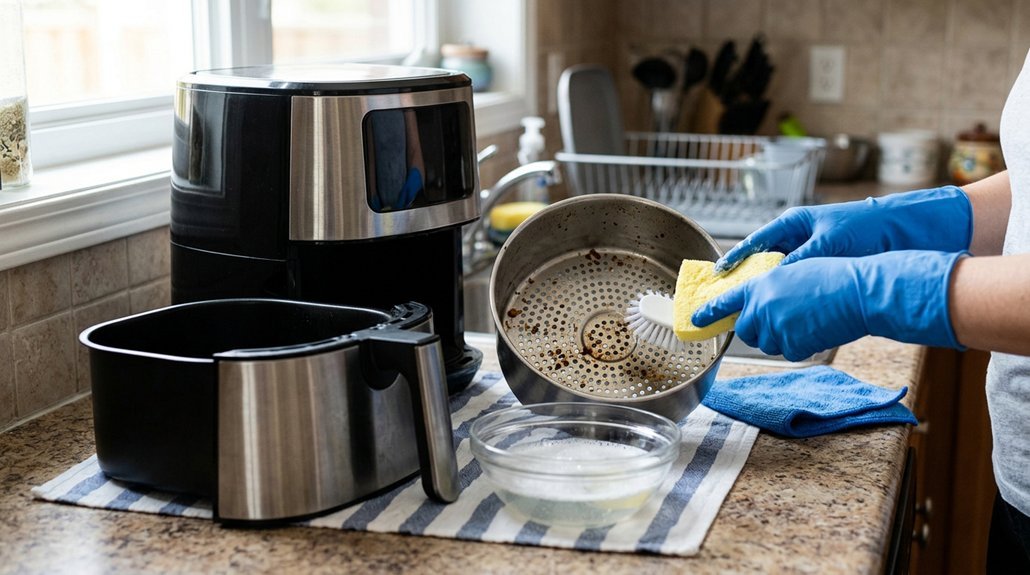
A clean air fryer tends to cook more evenly, produces less lingering odor, and helps prevent old grease from affecting the taste of new meals. Regular cleaning does not require harsh chemicals or a lengthy process. Dish soap, a soft sponge, and some attention to the basket, drawer, interior, and heating element are usually enough to manage everyday buildup.
Before cleaning, unplug the air fryer and allow it to cool completely. Once it has cooled, you can begin addressing the areas where grease and food residue typically collect.
Key Takeaways
How to Clean an Air Fryer Properly
Start by unplugging the air fryer and letting it cool completely. Once cooled, remove the basket, tray, and any other detachable parts before you begin cleaning.
Wash the removable parts in warm, soapy water using a non-scratch sponge, then rinse and dry them thoroughly. This helps prevent water spots and keeps the nonstick surfaces in good condition over time.
For stuck-on food or grease, a soft toothbrush paired with a baking-soda paste can loosen residue without scratching nonstick coatings. This method works well for the small ridges and corners inside the basket that are hard to reach with a sponge alone.
Wipe the interior and the heating element with a hot, damp cloth, but avoid getting excess water near electrical components. Some models have exposed heating coils, so it’s worth checking how your specific unit is built before wiping near that area.
Cleaning after each use helps prevent grease buildup, lingering odors, smoke, and burnt-on residue that becomes harder to remove over time. Since cleaning steps can vary slightly between brands, checking the manufacturer’s instructions for your specific model is a reasonable extra step before your first cleaning session.
If you’re comparing air fryers and want to know which models tend to have easier-to-clean parts or dishwasher-safe baskets, our air fryer buying guide breaks down those differences by brand and price range.
Gather Supplies and Unplug Your Air Fryer
Unplug the air fryer and let it cool completely before starting to clean. Working on a cooled, unplugged unit reduces the risk of burns and electrical shock.
A few basic supplies are typically enough for routine cleaning: a soft sponge, a soft toothbrush, paper towels, hot water, and dish soap. Dawn is a commonly used option for cutting through grease. Baking soda and vinegar can be kept nearby for tackling tougher, stuck-on residue later in the process. Unlike some kitchen appliances such as countertop dishwashers, which often include a self-cleaning cycle to cut down on manual scrubbing, air fryers still require hands-on care to stay spotless.
Steel wool and other abrasive or harsh cleaners are best avoided, since they can scratch nonstick coatings and other interior surfaces. Setting up on a protected work surface and separating any removable parts beforehand can make the cleaning process more organized and help prevent misplaced pieces.
Clean the Air Fryer Basket and Tray
Make sure the fryer is unplugged and fully cool before removing the basket and tray.
These parts collect most of the grease and stray crumbs, so cleaning them first makes sense.
Wash both pieces with warm water, dish soap, and a non-scratch sponge.
For stuck-on residue, a soft toothbrush with a baking soda paste can help loosen debris without damaging surfaces.
Many baskets rely on a mesh tray design that uses high-velocity air to crisp food with little oil, so it’s important to clear any trapped grease from the mesh openings.
Rinse thoroughly and dry completely before placing the parts back in the unit.
Abrasive scrubbers should be avoided, as they can wear down the non-stick coating over time.
Wipe the Air Fryer Interior Safely
Once the air fryer is unplugged and completely cool, wipe the interior walls and heating element with a hot, damp cloth or non-abrasive sponge.
Making this a quick after-use habit helps stop sticky residue from building up over time.
For fresh splatters, add a few drops of dish soap to the cloth, then wipe again with clean water to remove any soap residue.
Harsh chemicals and scouring pads are best avoided, since they can damage nonstick coatings and other interior surfaces.
Many newer models feature a PFAS-free ceramic coating, which still requires gentle, non-abrasive cleaning to preserve its nonstick performance over time.
Clean Grease From the Air Fryer Heating Element
Unplug the air fryer and let it cool completely before cleaning. Tip the unit forward carefully or slide out the drawer so the heating element is easier to reach without straining your wrist.
Use a soft toothbrush to brush away loose grease and debris from the coils. This step helps loosen buildup before wiping, which makes the next stage more effective. If you don’t have a spare toothbrush on hand, a handheld vacuum attachment can also help lift loose debris from tight corners before you move on to wiping the coils.
Wipe the coils gently with a hot, damp microfiber cloth. Avoid soaking the cloth or letting water drip into the unit’s internal components.
For stubborn, baked-on grease, a baking-soda paste can help lift residue. Apply the paste, let it sit for a few minutes, then wipe clean and dry the element thoroughly before using the air fryer again.
Regular cleaning after each use, rather than letting grease accumulate, tends to make this maintenance step faster and less labor-intensive over time.
Remove Air Fryer Odors and Burnt-On Food
Lingering odors and burnt-on food are easiest to handle once the air fryer has fully cooled. Grease splatter left on the basket and heating element can turn into a stale “last night’s dinner” smell, and in some cases may lead to smoking during the next use.
For tough, stuck-on residue, a soft toothbrush paired with a baking soda paste can help loosen buildup without scratching the basket’s coating. Gentle scrubbing is generally recommended over abrasive pads, since many baskets have nonstick surfaces that can wear down over time.
To help neutralize odors, some sources suggest heating vinegar and lemon in the air fryer at 400°F for about five minutes. This method is often mentioned as a low-effort way to freshen the appliance between deeper cleanings, though results can vary depending on the air fryer model and how much residue has built up. If cooking smells tend to linger in the kitchen afterward, running an air purifier with an activated carbon filter can help absorb lingering odors and VOCs from the air.
Because cleaning routines and basket materials differ across brands, it’s worth checking manufacturer instructions before using any specific cleaning method. If you’re comparing air fryers with easier maintenance in mind, our air fryer buying guide breaks down which models tend to have more cleanup-friendly designs based on their listed specifications.
Prevent Buildup Between Air Fryer Uses
Regular cleanup is the simplest way to keep grease from turning into smoky, burnt-on grime. Once the fryer has cooled and is unplugged, rinsing and drying the basket, tray, and drawer after every use helps prevent residue from building up.
Wiping the interior walls and heating element with a hot, damp cloth keeps grease from hardening between cleanings. Every few uses, a little dish soap or a baking-soda paste can help loosen sticky film before it sets.
Consistent cleaning matters more than any single method. Letting grease sit for extended periods makes it harder to remove and increases the chance of buildup affecting performance over time. Because the appliance relies on a fan circulating hot air, neglected grease can smoke and even trigger smoke alarms during later use.
Frequently Asked Questions
What Is the Easiest Way to Clean the Inside of an Air Fryer?
The easiest way to clean the inside of an air fryer is to unplug it, let it cool completely, and wipe the interior and heating element with a hot, damp cloth. For stuck-on food bits, a soft toothbrush or a soft-bristle brush can help loosen debris without scratching surfaces. Avoid abrasive scrubbers, steel wool, or harsh chemical cleaners, since these can damage the nonstick coating or interior finish on many models. If your air fryer has a removable basket or tray, check the manual to see if those parts are dishwasher safe for easier cleanup. Regular wiping after each use helps prevent grease buildup and makes deeper cleaning sessions quicker and less frequent.
How Can I Deep Clean My Air Fryer?
To deep clean your air fryer, unplug it and let it cool completely before starting. Remove the basket and drawer and soak them in hot, soapy water for about 15 to 20 minutes to loosen grease and food residue. For stubborn grime, make a paste with baking soda and water and scrub gently with a soft toothbrush or non-abrasive sponge. Wipe down the interior walls and heating element with a damp cloth, avoiding excess water near electrical parts. Rinse all removable pieces thoroughly and dry completely before reassembling. Check your owner’s manual first, since cleaning methods can vary slightly depending on the model.
What Is the Biggest Air Fryer Cleaning Mistake?
The biggest cleaning mistake is letting grease and crumbs build up behind or around the heating element instead of wiping the interior after each use. Over time, this residue can smoke, create odors, harbor bacteria, and even pose a fire risk in some models. To avoid this, clean the basket, tray, and interior walls regularly, and check behind the heating element periodically, since buildup there is often overlooked. Use a soft cloth or sponge rather than abrasive scrubbers, which can damage nonstick coatings, and skip harsh chemical cleaners that may leave residue or affect performance. Consistent, gentle cleaning after cooking is generally more effective than occasional deep cleaning, and it helps the appliance run efficiently over time.
How Do I Remove Baked-On Grease From My Air Fryer Element?
To remove baked-on grease from your air fryer element, unplug the unit and let it cool completely first. Gently scrub the element with a soft toothbrush dipped in hot water, or use a hot damp cloth to loosen residue. For stubborn, stuck-on grease, make a paste of baking soda and water, apply it to the affected area, let it sit for a few minutes, then scrub gently and wipe clean. Avoid metal scourers, steel wool, or abrasive scrubbers, since these can scratch or strip the element’s coating. Harsh chemical cleaners should also be avoided, as they may damage the element or leave residue that affects performance. Always check your model’s manual for specific cleaning guidance, since some elements may have different coatings or sensitivities.